Thursday, March 24, 2011

Ennegayi (Stuffed Eggplant)

This is my mom's recipe, and my favorite curry so far. Any stuffed veggies curry seems like a lot of work, but this one is easy breezy, because of the use of the readily available curry powder at home, instead of preparing the stuffings from scratch. I have tried it both ways, and at least for me, this one wins hands down.

This recipe serves four.


Ingredients:
10-12 Eggplants (small and round)
1 small onion sliced
8-10 curry leaves
1 teaspoon mustard
2 tablespoons Olive oil
2 tablespoons coarsely ground roasted groundnuts  (optional)
2 teaspoons garam masala
lime juice of half a lime 
cilantro for garnishing


For Stuffing:
Olive oil 1/4 cup
1 teaspoon salt
1 teaspoon red chili powder
2 tablespoon Sambhar Powder or Vangibath Powder
1 tablespoon Jeera (cumin) powder 


Method:
Cut off the stem part of the eggplant and cut it into halves lengthwise.
Now make vertical slits on the inside as show below.  


Now soak it in the water until ready for filling


Mix all the ingredients listed for stuffing and fill it in the vertical slits as shown above.


Heat 2 tablespoons of olive oil in a skillet on medium heat
Once hot add in mustard seeds 
Once they start spluttering add in curry leaves and add in onion after 5 seconds
After onion is half done (for about 5 minutes) arrange the eggplants in the skillet such that stuffings are on top
And add in any leftover stuffings on top and cover the skillet and cook for about 10 minutes.
Now add in garam masala and groundnut powder and add in water if required and cover the lid again and cook till eggplants are done, lightly tossing once in a while. To test if done, just pierce in an wooden spoon into an eggplant piece and it should cut it like butter.
Now remove it from heat, add in lime juice and garnish it with coriander leaves.
Enjoy it with chapatis or jeera rice :)


Tuesday, March 22, 2011

Pudina Pulav (Mint Rice)

This is our favorite weekend dish for two reasons. Firstly it's super easy to prepare. And secondly and mainly, because it's my husband's favorite food and he wants to savor it in leisure and in large servings.
I do not add any vegetables to this version of Pulav, because, I think veggies might mask the beautiful flavor of Mint. This recipe serves four.


Ingredients: 
2 cups Basmati Rice
3 1/2 cups water
3 tablespoons ghee (clarified butter)
3 large bay leaves
3 cloves
1/2 inch cinnamon
2 teaspoons jeera (cumin seeds)
4 cardamom
1 small onion, sliced
cashew chunks 1/4 cup
soy chunks 1/2 cup soaked in water for about 15 minutes (optional)
Salt to taste


Ingredients for making pudina paste:
1 bunch Pudina (Mint)
Fistful of coriander leaves
1 Stem curry leaves
4-5 small green chillies coarsely chopped
4 tablespoons ginger garlic paste
2 leaves of star anise
4-6 Cloves
1 inch cinnamon
1 tablespoon black peppers
1 tablespoon dry coconut flakes


Method: 


Make a paste out of above mentioned items for pudina paste. Add as less water as you can while grinding.
Heat ghee in the pressure cooker over medium heat. Note that this dish is made directly in the pressure cooker and not in a pan that's placed inside the cooker.
Once hot, splutter jeera and add in bay leaves, cloves, cinnamon, cardamom, and cashews.
Once you start getting the wonderful aroma of the spices, add in onions and cook till half done.
Now reduce the heat to low and add in pudina paste and let it simmer till done. The paste changes it's color from dark green to light green once done.
Now add in washed and drained rice and stir well gently for about a minute taking care not to break the rice.
Note that you should keep adding ghee if it's not enough to stir fry, anytime.
Now add in water and soy chunks and salt. A taste check can be done to see if you have added enough amount of salt. After salt gets completely dissolved in water, the water should taste lightly salty.
 Now close the lid and pressure cook for 2 whistles and remove the cooker immediately from stove top.
Your Pulav is ready once the cooker cools and the pressure is off.


Enjoy it with potato chips and Raitha :)


Note: Do not replace ghee with oil, since ghee is one of the key ingredients in this recipe.


Tuesday, March 15, 2011

Cheerios Churmuri - spice it up

 I'm not a sweet toothed person. But I still wanted to eat my cheerios since it's healthy and hearty. Also, mostly because I was initially flattered by it and had purchased a big box, which was sitting on my fridge top untouched, after my initial crush on it was over. 
So, I could say that this recipe was born out of sheer necessity, but it rekindled my fondness for cheerios. And once again, there is a brand new big box of it on my fridge top :)
This recipe serves four, but I and my husband act like two giants when I make it, and it's gone in ten minutes.


Ingredients:
1 cup grated carrot
1/2 cup finely chopped onions
1/4 cup finely chopped tomatoes (seeds removed)
1/4 cup finely chopped cucumber 
1/4 cup finely chopped coriander leaves
2 cups cheerios
1/4 cup Sev
1/4 cup salted peanuts
1 teaspoon green chutney
2 teaspoons sweet chutney
juice of 1/2 of big sized lime
salt to taste


Add carrot, onions, cucumber, tomatoes, coriander leaves, peanuts, chutneys, salt and lime juice into a big bowl and toss well until it's mixed throughly.
To this add your cheerios and Sev and mix well again and it's all set.

Enjoy :)

Tips: To remove the raw intense flavor of onions, cut it into half and immerse it in ice water for 10 minutes, before chopping.

Minestrone soup from scratch

By that I mean, you make it without store brought vegetable broth. It happened by accident. One day I ran out of vegetable broth and just sticked onto home-made stewed tomatoes and the result was excellent. Also guilt-free, due to the lack of extra sodium from canned stuff. 

Minestrone soup stands for thick Italian vegetable soup often with addition of pasta and rice in it. There is no set recipe for this soup, since it's made out of whatever vegetables are in season. That being said, below mentioned set of vegetables are my usual favorites that go into this soup.


This recipe serves six.


Ingredients
1/2 cup cooked pasta (preferably shell or macaroni type that can hold liquid in it)
1/2 cup overnight soaked and then pressure cooked kidney beans
2 cloves garlic minced
1/4 cup finely chopped onions
1/4 cup diced celery (let the leaves stay, they give the wonderful intense celery flavor)
1/4 cup diced carrot
1/4 cup green beans cubes
1/4 cup chopped cabbage
1/4 cup zucchini
1/4 cup bell peppers (any color is fine but I'm partial to red)
1/4 cup spinach
2 stems of fresh basil leaves or 1 teaspoon dried basil 
2 medium sized tomatoes
Salt, black pepper powder, red chili powder and sugar to taste


Method


Stewing tomatoes:
 Bring 4 cups of water to boil. 
 Make a cross mark on the tomatoes on the opposite side of the stem side and drop them in the boiling water for about 30 seconds.
 Now give them a shock treatment by dropping them immediately in the cold water. 
 This helps the easy peel of the outer skin of tomatoes. 
 Now dice them into large cubes and transfer back to the boiling water.
 Add salt, crushed black pepper, red chili powder and pinch of sugar to taste. And simmer it for 30 to 35 minutes.


Soup: 
 While tomatoes are stewing and your pasta is boiling and your kidney beans are being pressure cooked, you can start off with the soup preparation by cutting the above mentioned vegetables. 
 Heat 2 tablespoons of olive oil
 Once hot, add minced garlic and toss it until golden brown and then add in chopped onions.
 Once translucent, add in celery, carrots, green beans and cabbage.
 Once tender and 50% done, add in zucchini and bell peppers.
 Once tender add in spinach, stewed tomatoes, boiled pasta, boiled kidney beans and basil leaves (or dry basil).
 Add salt and crushed black pepper powder to taste.
Add in another two cups of water and simmer it for 10 to 15 mins.


And your soup is all set to be gulped, well not literally since it's going to be hot and all. Anyways, enjoy :)


Wednesday, March 9, 2011

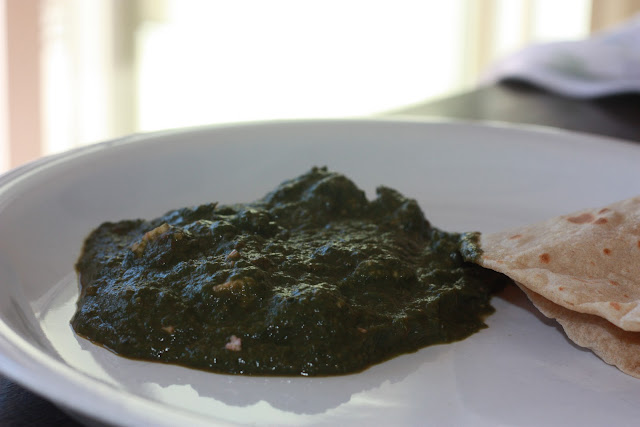
Palak Paneer or should I say 'Green Leaves Paneer'

This is one of the easiest yet the tastiest recipes. And I say 'Green Leaves Paneer' because, most of the green color things in my fridge goes into this recipe. The base note would still be Palak (Spinach), but I try to add a little bit of everything that is green to get a varied taste every time, and also basically to use up any leftover green leaves. Methi (fenugreek) leaves, curry leaves, coriander leaves, mint leaves, green peas and also the beetroot leaves. Yes, you heard me, the beetroot leaves. In fact this is one of the best recipes to use up your beet root leaves. This recipe serves four.


Ingredients:
Coarsely chopped Palak (Spinach) 2 bunches 
Olive oil 5 tablespoons
Garlic 4 cloves coarsely chopped
1/2 teaspoon turmeric
1/2 medium sized onion finely chopped
8 Cashews preferably roasted coarsely chopped
Finely chopped Green Chillies and salt to taste
juice of half a piece of lime or lemon
1/2 cup Paneer diced
1/4 cup grated Parmesan cheese (optional)


Rest of the ingredients mentioned below are optional and can be added in any quantity, preferably less than the quantity of spinach:
Methi (fenugreek) leaves 1/2 bunch (Coarsely chopped)
Curry leaves 5-6 sprigs  (Coarsely chopped)
Coriander leaves 1/4 bunch  (Coarsely chopped)
Mint leaves 5-6 sprigs  (Coarsely chopped)
Boiled Green peas  1/2 cup  (Coarsely chopped)
Beetroot leaves 1 bunch  (Coarsely chopped)


Method:
Heat 3 tablespoons of olive oil in a large skillet
Add in garlic, green chillies, curry leaves, cashews and turmeric
Once light brown add in onions and cook till they get soft and translucent
Now add in beetroot leaves and cook for about 3 mins on medium flame
Now add in Methi leaves and cook for about 1 min
Once lightly done, add in mint and spinach leaves and cook for another 1/2 a minute
Once lightly done add in boiled peas, salt and coriander leaves and toss a bit 
Now transfer it to a mixer and grind it coarsely with one pulse
Now add another 2 tablespoons of oil to the skillet and transfer back the ground paste.
Add in cheese and cook it on low flame constantly stirring, until cheese melts in
Now switch off the heat and add in the diced paneer. (I prefer them raw to fried, in this recipe)
And add in lime juice and it's ready to serve.


This curry goes well with both chapatis and rice.


Enjoy :)


Tuesday, March 8, 2011

Red Pepper Pasta Sauce

One of my favorite full meals is the easiest and healthiest Red Pepper Sauce with whole wheat Pasta and some oven roasted veggies like asparagus or broccoli or Brussels sprouts or all of it. 
The original recipe calls for oven roasting of Red Peppers and then removing their skin. It also calls for lots of  cream and cheese to make it a cheesy sauce. 
But my short cut version where I stir fry red peppers, is as good as the original, probably because I like more texture in my sauce. And I add minimum amount of milk and cheese, thus letting the spicy crunchy flavor of red pepper take the lead. This recipe serves two.


Red Pepper Sauce


Ingredients:
2 Red Peppers, diced 1 inch
1 Teaspoon of dry basil (if you have fresh basil in handy, its even more good. add two twigs of it)
3 cloves of garlic coarsely chopped
2 teaspoons of olive oil
1/4 cup half and half (or whole milk)
3 tablespoons grated Parmesan cheese (or more if you want it cheesy)
Black pepper, red chili flakes and salt to taste


Method:
Heat olive oil in a skillet.
Add coarsely chopped garlic and stir fry.
Once garlic turns light brown add in peppers.
Once red peppers gets soft, add in basil and stir fry for 30 seconds.
Now switch off the stove and grind this mixture, once cooled.
Return it to hot skillet and add in half n half (or milk), cheese, black pepper, red chili flakes and salt and cook on a low flame for about five minutes.
Your sauce is ready. You can add in the cooked pasta and it would be ready to serve.


Pasta:
Any pasta goes good, but my favorite is penne since it can hold more sauce and is hollow, thus not adding more volume and letting the sauce take a lead. 
You can cook pasta as per the instructions on the box. But one thing to remember is, to bring very large amount of water to boil and then toss in the pasta, that way it doesn't stick onto one another. Another good thing is to purchase wheat pasta which retains its shape and not get mushy and is also good for your health. Once drained, add the pasta immediately to the sauce.


Oven Roasted Veggies:
Asparagus: Best way to remove the bottom hard part of the asparagus is to bend the bottom of the spear until it snaps. Discard the bottom and use the top part.
Brussels Sprouts: Remove the top most layer and cut it into halves
Broccoli: Cut it as required. Do not discard the stem part of it, since its as tasty as the florets part.


Bring the oven to broil. Smear veggies with some olive oil, salt, black pepper and crushed garlic (McCormick Barbecue seasoning is also great instead of black pepper and garlic). 
Spread veggies on an aluminium foil and cook for about 15 mins turning veggies once in a while to ensure that it does not get burnt. 


Tips: You can also roast some coarsely chopped garlic in the oven while roasting veggies and add it to the pasta sauce. It gives a great crunchy taste.


Variation: If you toss in some fresh home made diced paneer to the sauce you'd get a great curry dish for your rice or chapatis.


An interesting fact: Red peppers are bursting with antioxidants, and one small red, yellow or orange pepper provides three times the recommended daily allowance of vitamin C - way ahead then what's found in citrus fruits like oranges. ( Source: http://www.gayot.com/lifestyle/health/features/bell-pepper-health-benefits.html )

Monday, March 7, 2011

Cooking... an art in itself


A pinch of orange zest can increase the fresh, sweet and spicy flavor of any food to a very new level. 


That being said, this blog is an attempt to record all my efforts in adding the same zestiness to my food experiments and to register all my favorite recipes so far, with the added variations if any. 


Food is an art. My first efforts of cooking was filled with excitement and apprehension to get it right. After some burnt dishes and fingers, I reached a level where I could whip out a decent meal out of a great recipe. 


After a while, it got mundane to eat a same old dish and I started exploring new and different recipes, and various cuisines. And then, there was that phase of late twenties, where one gets calories and health conscious. And this was when I started reading about the nutritional facts and health benefits of different vegetables and fruits and started substituting heavy ingredients with lighter ones, finding alternative ways to ensure less loss of nutrition while cooking, and trying to cook from scratch as much as I can, still finding shortcuts to reduce overwork. 


Ah... the balancing act, but it is all worth while, now when I see the eagerness and excitement with which my family awaits the meal of the day, each and everyday.


Didn't I mention, Food is an Art? An art like any other art, even after you think you have mastered, still provides you unlimited opportunities to explore more, and learn something new each and every day. 


This blog is a memoir to remember and cherish some of the meals we have enjoyed; and a journal to ensure that the wisdom I gained in regards to food, is not lost in time; and a hobby to uphold the art of cooking I cherish so much.